

Step 1: Convert The Background Layer Into A Smart Object
With the image newly-opened in Photoshop, if we look in the Layers panel, we see the image sitting on theBackground layer, currently the only layer in the document:
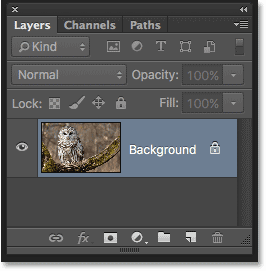
The Layers panel showing the photo on the Background layer.
Let's start by converting the layer into a Smart Object. That way, we'll be able to apply the High Pass filter as an editableSmart Filter. This will allow us to keep our sharpening effect separate from the image itself and avoid making permanent changes to the original.
To convert the layer into a Smart Object, click on the small menu icon in the top right corner of the Layers panel:
Clicking the Layers panel menu icon.
Then choose Convert to Smart Object from the menu that appears:
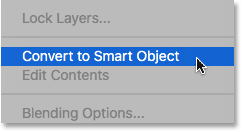
Choosing "Convert to Smart Object".
Nothing will seem to have happened to the image, but if we look again in the Layers panel, we now see a Smart Object icon in the lower right corner of the layer's preview thumbnail. This lets us know that the layer has in fact been converted to a Smart Object:
The layer preview thumbnail showing the new Smart Object icon.
Step 2: Apply The High Pass Filter
Next, we'll apply the High Pass filter. Go up to the Filter menu in the Menu Bar along the top of the screen, chooseOther, and then choose High Pass:
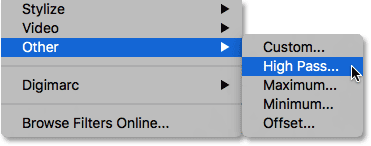
Going to Filter > Other > High Pass.
What Is "Image Sharpening"?
To understand why the High Pass filter is such a great tool for sharpening images in Photoshop, we need to understand how image sharpening actually works. After all, we don't get in there and physically sharpen pixels the way we'd sharpen a set of knives or a pair of ice skates. So what does "image sharpening" even mean?
Well, much like any good magic trick, image sharpening is nothing more than an illusion. It works by increasing contrast along the edges of objects in an image. Of course, Photoshop has no way of recognizing specific objects, so it considers an edge to be any area where there's a big, sudden change in brightness or color between neighboring pixels.
When you increase contrast along the edges, making the light side of the edge lighter and the dark side of the edge darker, your brain sees the increased contrast as "sharper". The more we boost the edge contrast, the sharper the image appears. But really, image sharpening has nothing at all to do with "sharpening" pixels. It has everything to do with increasing edge contrast.
Why Use The High Pass Filter?
So now that we know that we sharpen images by increasing contrast along the edges, what does that have to do with Photoshop's High Pass filter? Well, before we can increase contrast along edges, we first need a way of detecting the edges themselves. That's where the High Pass filter comes in. High Pass is an edge-detection filter. It looks specifically for edges in the image and highlights them. Any areas that are not considered part of an edge are ignored. Once we have the edges highlighted, we can then combine the results from the High Pass filter with one of Photoshop's contrast-boosting blend modes (as we'll see a bit later on) to easily increase contrast along edges without affecting the rest of the image. Let's take a closer look at how High Pass works.
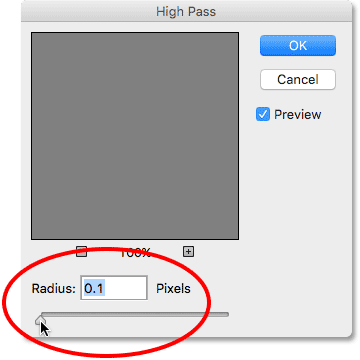
Photoshop's High Pass filter is very simple to use. Its dialog box is made up of little more than a preview window and aRadius slider along the bottom. As I mentioned, the High Pass filter detects edges in the image. We use the Radius slider to control how much highlighting to apply to those edges. Any areas that are not considered part of an edge are filled with neutral gray.
Let's start by dragging the Radius slider all the way to the left, to a value of 0.1 pixels (the lowest possible value):
Starting with Radius set to its lowest value.
Notice that at this point, the entire image is filled with neutral gray. There are no edges visible anywhere. That doesn't mean there are no edges in the image, or that the High Pass filter wasn't able to detect them. The problem is simply that the Radius value is too low at the moment for us to see them:

At the lowest Radius setting, no edges are visible.
Watch what happens, though, as we start to increase the Radius value by dragging the slider towards the right. I'll increase mine to 4 pixels:
Increasing the Radius value by dragging the slider to the right.
If we look again at the image (as well as in the preview window in the filter's dialog box), we now see faint highlights around the edges. Here, we see them around the owl's feathers and other features, as well as along the tree branches. Other parts of the image that are not considered part of an edge remain neutral gray:
Increasing the Radius value causes the edges to appear as highlights against the otherwise neutral gray background.
How Radius Works
I mentioned earlier that the Radius value controls the amount of highlighting that's applied to the edges, but that's really an oversimplification. What the Radius value actually does is it determines how many pixels on either side of an edge that Photoshop should include as part of the edge. A Radius value of 1 pixel, for example, would mean that Photoshop would include only a single pixel on either side of the edge; one pixel on the light side and one pixel on the dark side. If we increased the Radius value to, say, 10 pixels, then Photoshop would extend the width of the edges to 10 pixels on either side.
That's why we couldn't see the edges when we initially lowered the Radius value down to just 0.1 pixels. Photoshop was including only 10 percent of 1 pixel on either side of the edges, making the width too narrow to notice. Yet when I increased my Radius value to 4 pixels, Photoshop extended the width of the edges out to 4 pixels on either side, making them wide enough to be easily visible.
What you need to be careful of when using High Pass to sharpen images is that you don't push the Radius value too far, as that will cause too much of the image to be included as part of an edge. To show you what I mean, I'll increase my Radius value to something extreme, like 40 pixels:
Increasing the Radius value to a ridiculously high amount.
And here we see the result. At a Radius value of 40 pixels, Photoshop is extending the width of the edges out to 40 pixels on either side. At that size, pretty much the entire image is now considered part of an edge, and we've gone from subtle highlighting against an otherwise neutral gray background to seeing large halos everywhere, creating a weird embossed effect:
An example of what happens when we increase the Radius value too much.
That's not to say that the "weird embossed effect" doesn't have its uses. It's just not useful when we're trying to sharpen an image. Remember, sharpening works by increasing contrast along edges without affecting any other areas. So for the best sharpening results with the High Pass filter, you want to choose a Radius value that's just large enough to bring out the highlights while still keeping those highlights as close to the actual edges as possible.
The exact Radius value you choose will depend on your image. Larger images will generally need a larger Radius value than smaller images to achieve the same result. In general, Radius values of between 1 and 5 pixels tend to work best. For my image, I'll go with 3 pixels. Click OK to accept your Radius value and close out of the High Pass dialog box:
Setting the Radius value to a more reasonable 3 pixels.
Here's what my result looks like. We're back to a neutral gray image for the most part, with the edge highlighting visible but still quite subtle:
The effect with Radius set to 3 pixels.
Step 3: Change The High Pass Filter's Blend Mode To "Overlay"
So far, so good. We've highlighted our edges. Now we need a way to blend the result of the High Pass filter in with the original image. We also want to use the highlights we created with the High Pass filter to increase the edge contrast. We can do both of these things simply by choosing the right blend mode for the High Pass filter.
If we look in the Layers panel, we see our High Pass filter listed as a Smart Filter below the image. To change the filter's blend mode, double-click on the Blending Options icon to the right of the filter's name:
Double-clicking on the Blending Options icon.
This opens the Blending Options dialog box. You'll find the Mode option (short for "Blend Mode") at the very top. By default, the blend mode is set to Normal. To use our edge highlighting to boost contrast along the edges, we'll need to use one of Photoshop's contrast-boosting blend modes. There's a few of them to choose from, but the one that usually works best for image sharpening is Overlay:
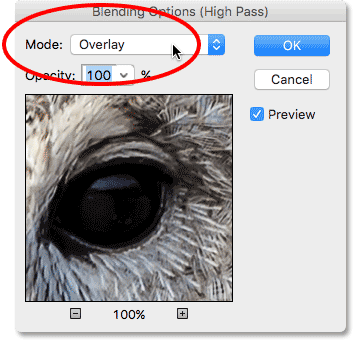
Changing the blend mode of the High Pass filter to Overlay.
The Overlay blend mode ignores any areas of neutral gray, so all of those non-edge neutral gray areas created by the High Pass filter instantly disappear from view. It then uses the lighter highlights to lighten the light sides of the edges even further, and the darker highlights to darken the dark sides of the edges even further, boosting the contrast of the edges and creating the illusion of a sharper image.
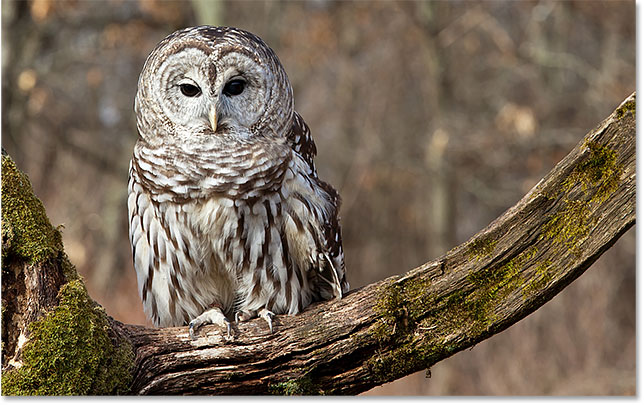
Here's a before-and-after comparison to help make the sharpening effect easier to see. On the left is what the original image looked like before any sharpening was applied. On the right is the result using the High Pass filter and the Overlay blend mode:
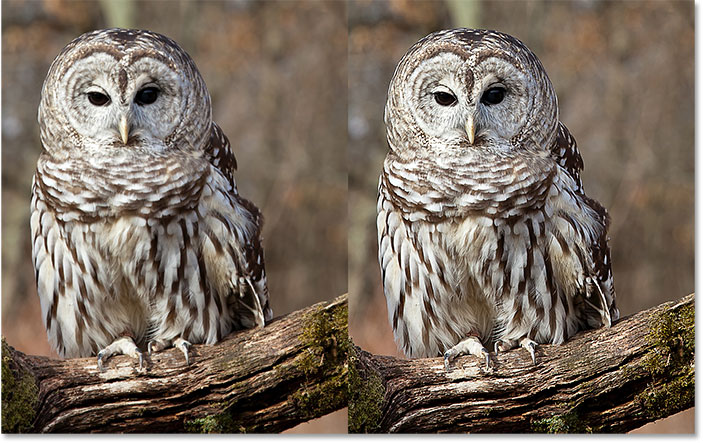
A before (left) and after (right) comparison of the sharpening effect.
The "Soft Light" And "Hard Light" Blend Modes
If you find that the sharpening effect you're getting from the Overlay blend mode is too strong, try the Soft Light blend mode instead. It works exactly the same as Overlay but the results are more subtle:
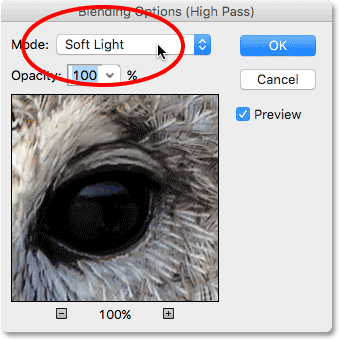
Soft Light creates a less intense sharpening effect than Overlay.
Or, if you find that the Overlay sharpening effect isn't strong enough, try the Hard Light blend mode, which will give you the most intense sharpening of the three:
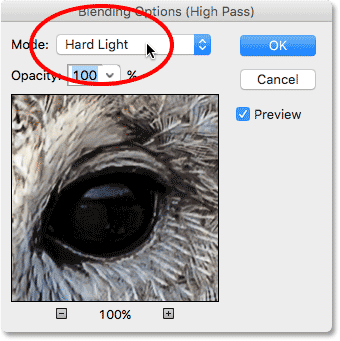
Hard Light creates a more intense sharpening effect.
Here's a side-by-side comparison of the High Pass filter set to all three blend modes, with Soft Light on the left, Overlay in the center and Hard Light on the right. The Overlay blend mode is generally the one you'll use the most:
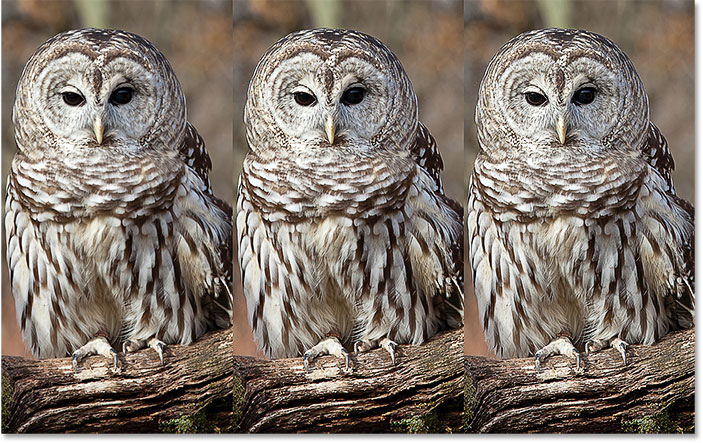
The Soft Light (left, least intense), Overlay (center, average) and Hard Light (right, most intense) blend modes.
Step 4: Lower The Opacity If Needed
Finally, regardless of which blend mode you choose, you can fine-tune the sharpening amount even further in the Blending Options dialog box by adjusting the opacity of the High Pass filter. You'll find the Opacity option directly below the Mode option. The more you lower the opacity from its default value of 100%, the more the original, unsharpened image will show through:

Lowering the opacity of the High Pass filter.
In my case, I'm going to leave the opacity value set to 100%. Once you've chosen the blend mode that gives you the right amount of sharpening for your image, and you've adjusted the High Pass filter's opacity if needed, click OK to close out of the Blending Options dialog box.
And with that, we're done! To see what your image looked like before applying your sharpening, click on the High Pass filter's visibility icon (the eyeball icon) to the left of its name in the Layers panel:
Clicking the visibility icon for the High Pass filter.
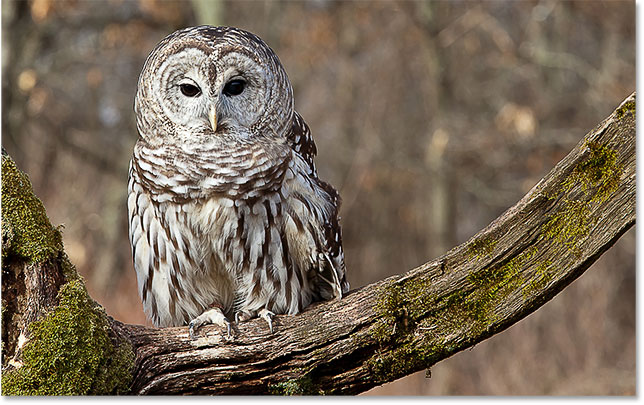
With the High Pass filter turned off, you'll see your original, unsharpened image:
The original image once again.
Click the visibility icon again (the empty spot where the icon appeared) to turn the High Pass filter back on an view the sharpened version. Here's my result using the Overlay blend mode:
The image with sharpening applied.
And there we have it! That's how to easily sharpen images and get professional quality results using nothing more than the High Pass filter and the Overlay, Soft Light or Hard Light blend modes in Photoshop! Be sure to check out our Photo Retouching section for more image editing tutorials!
copied from:-http://www.photoshopessentials.com/
No comments:
Post a Comment